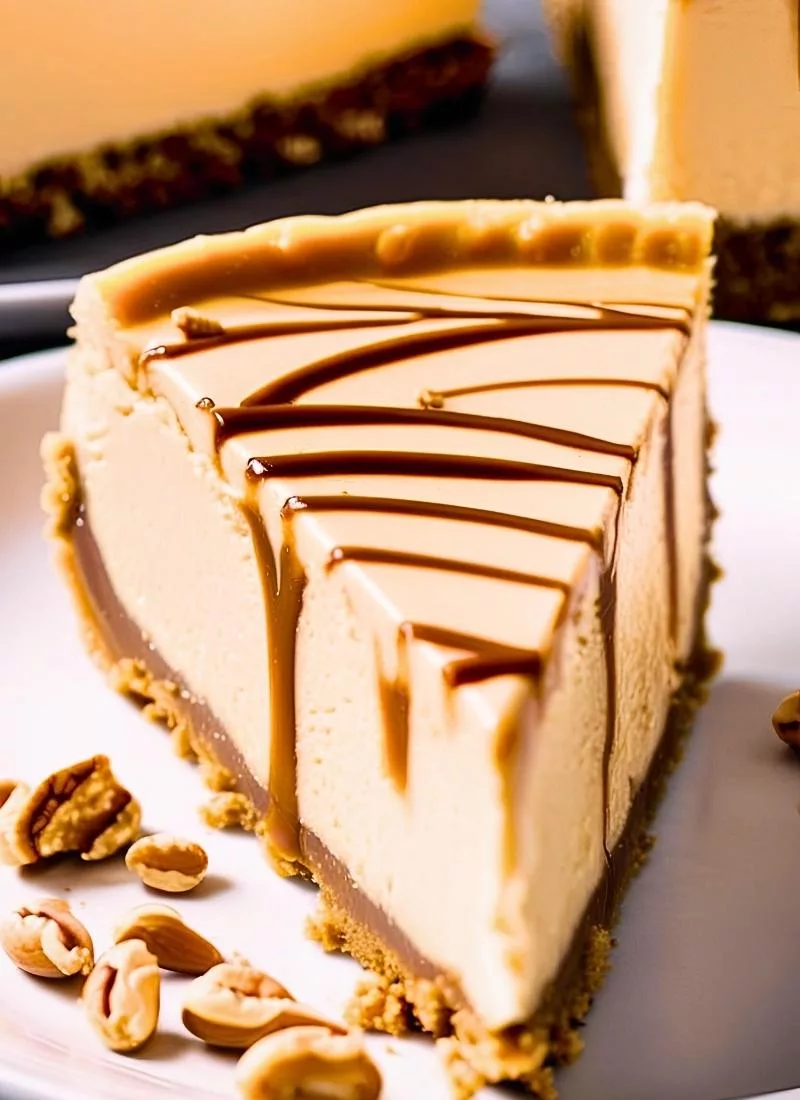
Ever had a dessert that just screams comfort, love all at once? Well, this Peanut Butter Cheesecake You’ll Love! is exactly that kind of treat. Seriously, it’s the kind of dessert that makes you wanna jump into the kitchen right now. With a crunchy Oreo crust, a creamy peanut butter filling that’s so smooth it melts in your mouth, and a rich chocolate ganache topping that’s just a little too good to resist, this cheesecake is a total game-changer.
Honestly, I first made this for a family gathering years ago, and it’s been my go-to ever since—everyone begs for it! Plus, it’s a no-bake recipe, so you’re basically done in a few steps, making it perfect for those days when you’re craving something decadent but don’t wanna spend hours in the kitchen.
Now, let’s get into why this cheesecake is absolutely gonna steal your heart—or at least your taste buds!
Why You’ll Love This Peanut Butter Cheesecake
- It’s a no-bake dream. Seriously, you don’t even need to turn on the oven—just mix, chill, and enjoy. Very easy for busy days!
- That creamy peanut butter filling. It’s so rich and smooth, you’ll probably sneak a spoonful before it even makes it to the crust.
- The Oreo crust adds the perfect crunch. It’s slightly sweet, a bit chocolatey, and pairs so well with the peanut butter—it’s like a match made in heaven.
- Chocolate ganache on top? Mmm! It’s almost too indulgent, but in the best way possible—think Reese’s Peanut Butter Cup vibes.
- Perfect for sharing (or not). You’ll impress everyone at the party, or just keep it in the fridge for late-night snacking—no judgment here!
Anyway, let’s talk about why this is the best homemade peanut butter cheesecake you need in your life.
Best Peanut Butter Cheesecake You Need
If you’re a cheesecake lover—or even if you’re just obsessed with peanut butter—this recipe is gonna be your new fave. Honestly, it’s got everything you want in a dessert: creamy, rich, a little crunchy, and so peanut-buttery you’ll be dreaming about it for days. I mean, I’ve tried a lot of peanut butter cheesecake recipes over the years, but this one? It’s definitely the best cheesecake recipe homemade style I’ve ever come across. It’s got that thick crust cheesecake vibe with an easy no-bake peanut butter cheesecake twist. And the chocolate peanut butter cheesecake combo? It’s basically a decadent peanut butter pie in cheesecake form! Now, let’s break down the ingredients so you know exactly what you’re working with.
Ingredients Notes
Here’s the lineup for this peanut butter cheesecake—it’s pretty simple, but each part plays a big role in making it absolutely amazing.
Crust
- 24 Oreo cookies (crushed into fine crumbs): Use the whole cookie, filling and all—it’s so much better that way! You can crush them in a food processor or just smash them in a ziplock bag with a rolling pin if you’re feeling a bit feisty.
- 5 tablespoons butter (melted): This helps hold the crust together and adds a little richness. Make sure it’s fully melted so it mixes evenly with the crumbs.
Peanut Butter Cheesecake Filling
- 2 ½ cups cream cheese (softened): Full-fat works best for that creamy texture we all love—don’t skimp here! Let it sit out for a bit so it’s easier to mix.
- 1 ¾ cups confectioners’ sugar: This sweetens the filling just right without making it grainy. Sift it if it’s lumpy for a super smooth result.
- 1 cup peanut butter (smooth): Go for the creamy kind, not crunchy, so your filling is velvety. I usually use a classic like Jif or Skippy—nothing fancy needed!
- 1 teaspoon vanilla extract: This adds a little depth and makes it taste more homemade. Don’t skip it—it’s small but mighty.
- ½ cup heavy cream: This lightens up the filling and makes it so fluffy you’ll wanna eat it straight from the bowl.
Chocolate Ganache
- 1 cup chocolate chips (or finely chopped chocolate bar): Semi-sweet or dark chocolate works great here—just pick what you love. I often use chocolate chips ‘cause they’re easy to measure.
- ¾ cup full-fat coconut cream: This makes the ganache silky and rich without needing heavy cream. Shake the can well before using so it’s nice and smooth.
Alright, you’ve got your ingredients ready—now let’s jump into the fun part: making this cheesecake!
Step-by-Step Instructions for Peanut Butter Cheesecake

This no-bake recipe comes together in just a few steps, and it’s so easy you’ll wonder why you haven’t made it sooner. Let’s break it down so you can nail it on the first try.
Step 1: Make the Oreo Crust
Start by grabbing those 24 Oreo cookies and crushing them into fine crumbs—you want them pretty fine so the crust holds together well. I usually toss them in a food processor, but if you don’t have one, a ziplock bag and a rolling pin work just as good. Mix the crumbs with 5 tablespoons melted butter in a bowl until it looks like wet sand—mmm, it already smells amazing! Press this mixture into the bottom of an 8 or 9-inch springform pan, making sure it’s even and packed tight. Pop it in the fridge to chill while you work on the filling—it’ll set up nicely that way.
Pro Tip: Use the bottom of a glass to press the crust down—it makes it super even and saves your fingers from getting messy!
Step 2: Whip Up the Peanut Butter Filling
In a big mixing bowl, beat your 2 ½ cups softened cream cheese with 1 ¾ cups confectioners’ sugar until it’s smooth and creamy—this usually takes a couple of minutes with a hand mixer. Add in 1 teaspoon vanilla extract and 1 cup smooth peanut butter, and keep mixing until it’s all combined and looks velvety. Now, slowly pour in the ½ cup heavy cream while beating—it’ll get fluffy and light, which is exactly what you want. Once it’s all mixed, give it a quick taste (you know you want to) and then spread it over your chilled crust. Smooth the top with a spatula for that pretty finish.
Pro Tip: Make sure your cream cheese is really softened—if it’s too cold, you’ll end up with lumps, and nobody wants that!
Step 3: Chill the Cheesecake
Cover your cheesecake with some plastic wrap and pop it in the fridge for at least 6 hours, or overnight if you’ve got the time. This step is super important ‘cause it lets the filling set up nice and firm so it slices beautifully. Honestly, I usually make mine the night before—it’s one less thing to stress about the next day! While it’s chilling, you can start dreaming about that chocolate ganache topping—it’s gonna take it to the next level.
Pro Tip: If you’re in a rush, you can stick it in the freezer for about 2 hours instead, but don’t forget to move it to the fridge after so it doesn’t freeze solid!
Step 4: Make the Chocolate Ganache
When your cheesecake is set, it’s time to make the ganache. Heat up your ¾ cup full-fat coconut cream in a small saucepan or microwave until it’s warm—not boiling, just warm enough to melt the chocolate. Pour it over your 1 cup chocolate chips in a heatproof bowl and let it sit for 1-2 minutes—this gives the chocolate time to soften. Then whisk it all together until it’s smooth and glossy—mmm, it’s basically liquid gold! Pour this over the top of your chilled cheesecake, spreading it out evenly with a spatula.
Pro Tip: If the ganache starts to thicken while you’re working, just pop it in the microwave for 10 seconds to loosen it up—it’ll spread much easier!
Step 5: Final Chill and Serve
Pop the cheesecake back in the fridge for another 30 minutes so the ganache can set—it’ll get that perfect shiny finish we all love. After that, it’s ready to slice and serve! Run a knife around the edges of the springform pan before you release it to make sure it comes out clean. Cut into slices and watch everyone’s eyes light up when they see that chocolate peanut butter cheesecake goodness. It’s seriously a showstopper!
Pro Tip: Dip your knife in hot water and wipe it dry before each cut—it’ll give you clean, pretty slices every time!
Storage and Serving
Once you’ve had your fill (if there’s any left!), store leftovers in an airtight container in the fridge—it’ll stay fresh for up to 4 days. Just make sure it’s covered well so it doesn’t pick up any funky fridge smells. When you’re ready for round two, there’s no need to reheat—just grab a slice and dig in straight from the fridge. Honestly, it tastes even better the next day once all the flavors meld together! If you wanna get fancy, top each slice with a little extra peanut butter topping or some crushed Reese’s Pieces—trust me, it’s worth it.
Tips for Success
Wanna make sure your cheesecake turns out perfect every time? Here are a few tricks I’ve learned along the way. First, don’t rush the chilling time—it’s really key for that firm, sliceable texture we all love. Also, if your peanut butter is super thick, microwave it for 10 seconds to soften it up—it’ll mix into the filling so much easier. Oh, and if you’re worried about the crust sticking, you can line the bottom of your pan with parchment paper before pressing it in—just a little extra insurance! Lastly, for an extra peanut buttery kick, swirl some melted peanut butter into the filling before chilling—it’s basically like a peanut butter swirl cheesecake upgrade.
Variations
Not gonna lie, this recipe is pretty perfect as is, but there are some fun ways to switch it up if you’re feeling creative.
- For a lighter version, you can cut back on the cream cheese and add more heavy cream—just don’t go too crazy or it might not set as well.
- Wanna mix in some candy? Chop up some Reese’s Peanut Butter Cups and fold them into the filling for a Reese’s Peanut Butter Cup cheesecake vibe.
- Or, if you’re feeling wild, swap the Oreo crust for a pretzel crust—it adds a salty crunch that’s so good with the sweet filling.
Oh, and for a PB&J twist, swirl some jelly into the top before chilling—think PB and J cheesecake magic!
What Others Are Saying About the Recipe
- Sarah couldn’t stop raving: “I made this for my sister’s birthday, and it was gone in like an hour—I swear it brought back all our childhood Reese’s Cup dessert memories!”
- Emily got super sentimental: “This cheesecake literally tastes like love—like my mom used to make something similar, and now I’m hooked all over again.”
- Jessica was shocked: “I didn’t think I’d impress my picky in-laws with this, but they begged for the recipe—it’s now my go-to for every family gathering!”
- Mike felt like a pro: “I’m not even a baker, but this came out so good I felt like I could open a bakery—definitely the best peanut butter dessert I’ve ever had!”
FAQs about Peanut Butter Cheesecake
Can I use crunchy peanut butter instead of smooth?
You totally can if you love a bit of texture! Just keep in mind it might make the filling a little less silky, but it’ll still taste amazing. I’ve tried it both ways, and crunchy gives it a fun twist—kinda like a peanut butter cookie cheesecake vibe.
How long does this cheesecake last in the fridge?
It’ll stay good for about 4 days if you keep it in an airtight container. Honestly, the flavors get even better after a day or two—just don’t expect it to last that long ‘cause it’s so hard to resist! Make sure to cover it well so it doesn’t dry out.
Can I freeze this cheesecake for later?
Yes, and it freezes like a dream! Wrap it tightly in plastic wrap and then foil, and it’ll keep for up to 2 months. When you’re ready to eat, just thaw it in the fridge overnight—it’ll be just as creamy and delicious as the day you made it.
What if I don’t have a springform pan?
No worries—you can use a regular 8 or 9-inch pie dish instead! Just press the crust in like normal and follow the same steps. It might be a bit trickier to slice, but it’ll still taste just as good—promise!
In Conclusion
This peanut butter cheesecake is honestly the kind of dessert that makes any day feel special—so creamy, so peanut-buttery, and absolutely packed with love in every bite. Whether you’re making it for a party or just treating yourself (no judgment!), it’s gonna hit all the right spots. I mean, who can resist that chocolate peanut butter cheesecake combo? So go ahead and give it a try—I’d love to hear how it turns out for you! Drop a comment below or share a pic on Pinterest—I’m dying to see your creations. What’s your fave way to tweak a cheesecake? Let me know!